Using a laptop screen as a monitor can transform your workspace. It offers more screen space without buying extra equipment. This guide will show you how to do it.
Whether you're a student, remote worker, or tech enthusiast, this setup can boost productivity. It’s a cost-effective way to expand your digital workspace.
We’ll explore different methods for Windows and macOS. You’ll learn about built-in features and third-party software solutions.
Wired and wireless options will be covered, ensuring you find the best fit. Get ready to enhance your multitasking capabilities with ease.
Why Use a Laptop Screen as a Monitor?
Using a laptop screen as a monitor offers many benefits. It expands your desktop space, providing extra room for open applications. This setup enhances productivity by allowing you to view more information simultaneously.
Moreover, it’s a budget-friendly option. You can avoid buying an extra monitor by utilizing the equipment you already own. This method can be useful for various activities like gaming, designing, and coding.
Benefits of Using a Laptop Screen:
- Enhances multitasking ability
- Saves money
- Increases productivity
- Reuses existing devices
- Improves workflow
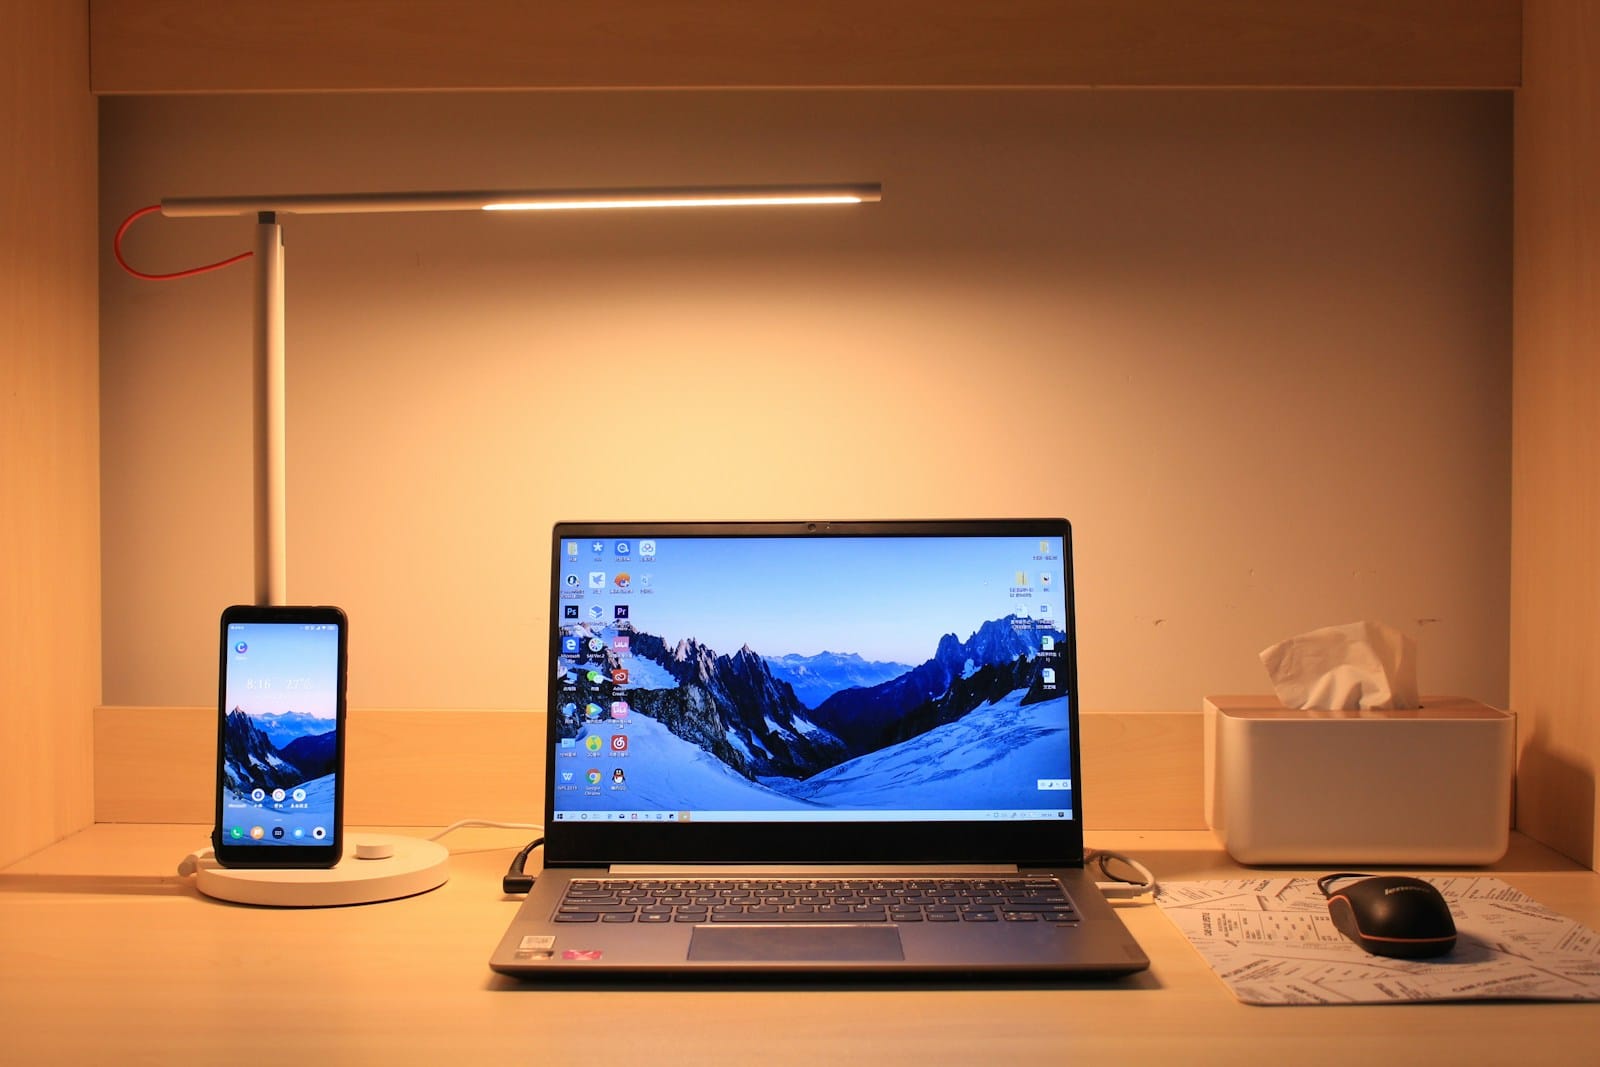
 Laptop showing display settings for dual monitors | Photo by TONG CHEN on Unsplash
Understanding the Basics: What You Need
To use a laptop screen as a monitor, you'll need a few essentials. First, check if both devices support screen sharing features. Compatibility can vary based on the operating systems in use.
Next, ensure that both devices connect to the same network for wireless options. For wired connections, inspect available ports like HDMI or USB-C.
Gathering the proper tools and settings streamlines the setup. Your laptop may require specific settings adjustment, especially when using different brands.
Key Requirements:
- Compatible operating systems
- Stable network connection
- Necessary cables for wired connections
- Updated software and drivers
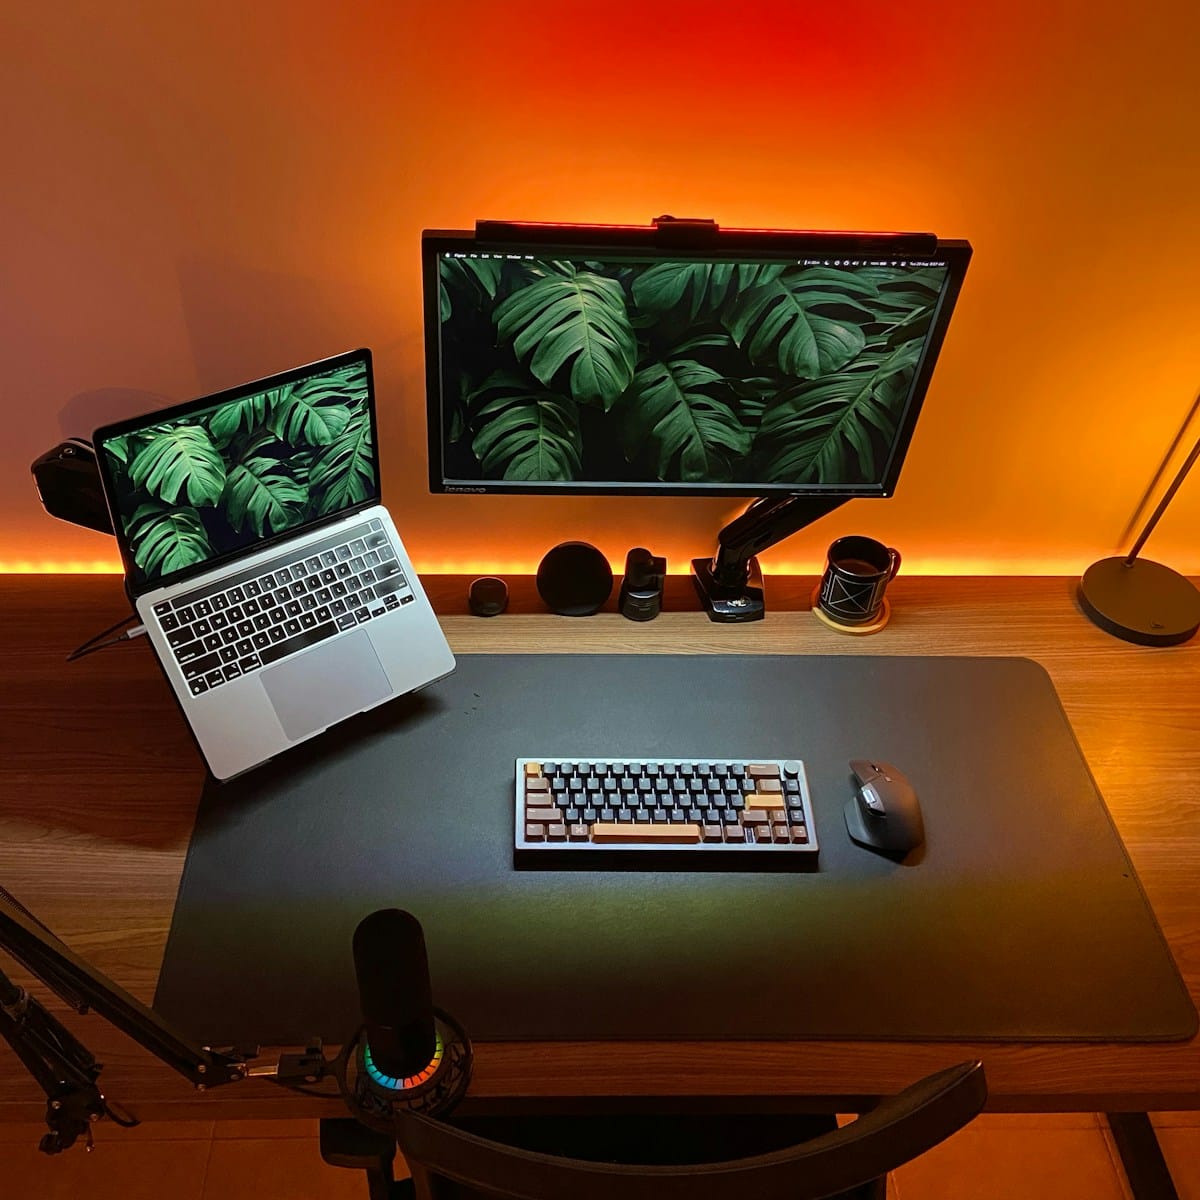
 Laptop and devices prepared for connection | Photo by João Inácio on Unsplash
Method 1: Using Windows Built-in Features
Windows offers built-in features to utilize a laptop screen as an additional monitor, with "Projecting to this PC" being a widely recognized function for this purpose. It conveniently enables wireless display connections.
Configuring Settings on the Receiving Laptop (the one acting as a monitor):
- Open "Projecting to this PC" Settings:
- Navigate to "Settings" > "System" > "Projecting to this PC."
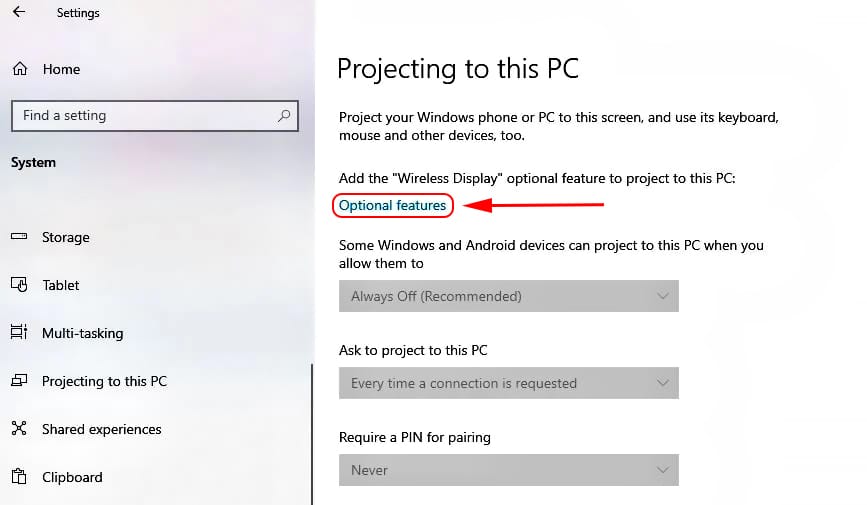
- Install "Wireless Display" Feature (if options are grayed out):
If the options on the "Projecting to this PC" page appear grayed out and unclickable in Step 1, it indicates that your system has not yet installed the "Wireless Display" feature. Please follow these steps to install it:
- Click "Optional features" on the current page.
- Click "Add an optional feature."
- Find and select "Wireless Display" from the list, then click "Install."
- After the installation is complete, please restart your laptop.
- After restarting, return to "Settings" > "System" > "Projecting to this PC," and you should find that the options are now clickable.
 The "Projecting to this PC" settings page
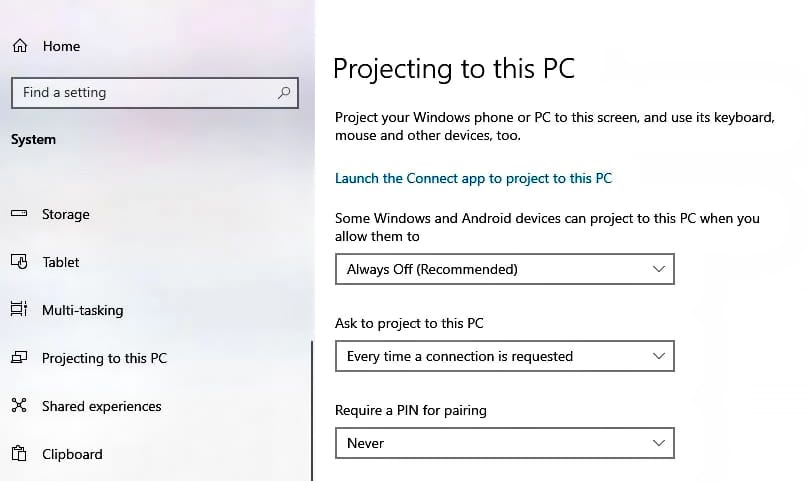
- Configure "Projecting to this PC" Settings:
On the "Projecting to this PC" page, adjust the following settings according to your needs:
- Some Windows and Android devices can project to this PC when you allow them to:
We recommend choosing
"Available everywhere" or
"Available everywhere on secure networks." The latter provides higher security in public network environments.
- Ask to project to this PC:
Select "Every time a connection is requested" or
"First time only." "First time only" will be more convenient for frequently connected devices.
We suggest selecting
"Never" for ease of connection. However, if security is a higher priority, you can choose
"First time only" or
"Always."Tip: After installing the
"Wireless Display" feature, you can directly launch the application by searching for
"Wireless Display" in the Windows search bar, or by clicking the blue text
"Launch the Connect app to project to this PC" at the top of the
"Projecting to this PC" page to enter a waiting state for connection.
 The "Projecting to this PC" settings page after the "Wireless Display" feature has been successfully installed
Projecting from Your Primary Device (the one whose screen you want to extend):
- Connect to a Wireless Display:
- On your primary device, press the Windows key + P combination, or access the "Connect" option from the Action Center.
- Select "Connect to a wireless display."
- Ensure both devices are on the same network.
- Select Your Laptop:
At this point, your primary device should detect the laptop acting as a monitor. Choose your laptop's name from the list.
If prompted, enter the PIN displayed on the laptop.
- Choose Display Mode:
Once the connection is established, you can choose to "Extend" or "Duplicate" your display. Selecting "Extend" will expand your workspace, while "Duplicate" will mirror the content of your primary screen onto the laptop.
Quick Steps Overview:
- On the Receiving Laptop:
- Open "Settings" > "System" > "Projecting to this PC."
- Install the "Wireless Display" feature if needed.
- Configure projection settings (availability, requests, PIN).
- Launch the Connect app (optional).
- On the Primary Device:
- Press Windows key + P or select "Connect" from the Action Center.
- Choose your laptop's name.
- Select "Extend" or "Duplicate" display.
Important Notes:
- All devices must be on the same local network (Wi-Fi).
- This feature is recommended for use with newer versions of Windows 10 or Windows 11 for the best experience.
- To ensure a smooth connection, it's advisable to open the "Wireless Display" or "Connect" app on the laptop acting as a monitor beforehand, making it discoverable.
- Projecting consumes power, so it's recommended to keep the laptop plugged in during the projection.
- After you finish projecting, for security and power saving, remember to turn off the availability option in the "Projecting to this PC" settings (e.g., change it back to "Always off").
Method 2: Using macOS and AirPlay
For Mac users, AirPlay is a reliable tool. It allows you to use a MacBook as a second monitor effortlessly. First, ensure both devices are on the same Wi-Fi network.
On your MacBook, access "System Preferences" and select "Displays." Enable the "AirPlay Display" option. This prepares your MacBook to receive input.
Next, on the primary Apple device, click the AirPlay icon in the menu bar. Select your MacBook from the list to start screen mirroring. You can choose to extend or mirror your display.
Quick Steps:
- Open "System Preferences" > "Displays"
- Enable "AirPlay Display"
- Select MacBook from AirPlay menu
This method enhances productivity with minimal setup. Using AirPlay is seamless and integrates well with Apple ecosystems.
Using this feature is a straightforward way to expand your screen space. Experiment with the settings to suit your workflow.
Method 3: Third-Party Software Solutions
Using third-party software can offer flexibility. It lets you use a laptop screen as a monitor on various operating systems. Notable applications include SpaceDesk and Duet Display.
These programs often support both Windows and macOS. They provide straightforward interfaces for easy setup. First, download and install your chosen software on both devices.
Launch the application on the primary computer. Follow on-screen instructions to connect to your laptop. Make sure both devices are network-connected for seamless operation.
Popular Software Options:
- SpaceDesk: Works well for Windows-based systems.
- Duet Display: Supports Windows and macOS, offering versatile connectivity.
- Splashtop Wired XDisplay: Known for low latency and wired connections.
Third-party solutions often come with customization options. They allow for resolution adjustments and seamless integration. This approach is ideal for users with specific needs and configurations.
Method 4: Wired Connections (HDMI, USB-C, VGA)
Wired connections provide a stable and often more reliable way to use your laptop as a monitor. This method involves connecting your laptop to another device using an HDMI, USB-C, or VGA cable. Ensure that both devices have compatible ports for your chosen cable type.
Once connected, you'll need to adjust display settings. Access your laptop's display settings to either extend or duplicate your primary screen. This setup usually results in better performance, eliminating latency common in wireless connections.
Steps for Wired Setup:
- Verify ports on both laptop and primary device.
- Choose compatible cable (HDMI, USB-C, or VGA).
- Connect the devices and adjust display settings.
Wired connections are particularly beneficial for gamers and designers. They offer crisp images and zero lag. This method also ensures that connectivity issues from wireless networks are avoided, maintaining a consistent display.
Step-by-Step Setup Guide
Setting up your laptop screen as a monitor involves a few simple steps. First, decide which method best suits your needs—whether it's a wired or wireless connection. Each method has unique benefits and requirements.
For a wireless setup, ensure both devices are connected to the same network. This connectivity is crucial for effective communication between them. Adjust network settings if necessary.
For wired connections, connect your devices using the appropriate cable. Configure the display settings once the connection is established to extend or mirror displays.
Basic Steps:
- Determine wireless or wired preference.
- Ensure network connectivity for wireless.
- Use appropriate cable for wired.
- Adjust display settings on laptop.
Make sure the laptop's screen resolution is compatible with your primary device for optimal clarity. For a smoother experience, keep your devices updated, ensuring drivers and software are current.
Troubleshooting Common Issues
Encountering problems when using a laptop screen as a monitor is not unusual. Most issues arise from simple configuration errors or connectivity problems.
Make sure all drivers are up-to-date and that the correct display settings are enabled. If the screen flickers or disconnects, consider checking your cables for damage or weak Wi-Fi signals.
Common Issues to Check:
- Outdated drivers or software
- Incorrect display settings
- Faulty cables or connectors
- Unstable network connection
By addressing these common issues, you can enjoy a seamless experience when using your laptop screen as a monitor.
Conclusion
Using your laptop screen as a monitor can boost productivity and save costs. Whether for work or play, expanding your screen real estate offers numerous benefits.
By choosing the right method and following detailed steps, you can easily set up your laptop as an additional display. Enjoy enhanced multitasking and a more dynamic workspace!


